Standalone Status Menu in a Mac Catalyst App

I make a somewhat successful app called Cheatsheet, which is available for iOS, watchOS, and — thanks to Catalyst — macOS. Cheatsheet makes it easy to get to your notes from anywhere, which means widgets and custom keyboards on iOS and complications on watchOS. On macOS, Cheatsheet has a status menu app.
Look up at the righthand side of a Mac’s menu bar and you’ll see a row of icons called status menus. Several status menus are provided by macOS, such as the Wi-Fi and Volume controls. Third-party apps can also create status menus to provide easy, always-available access to app features.
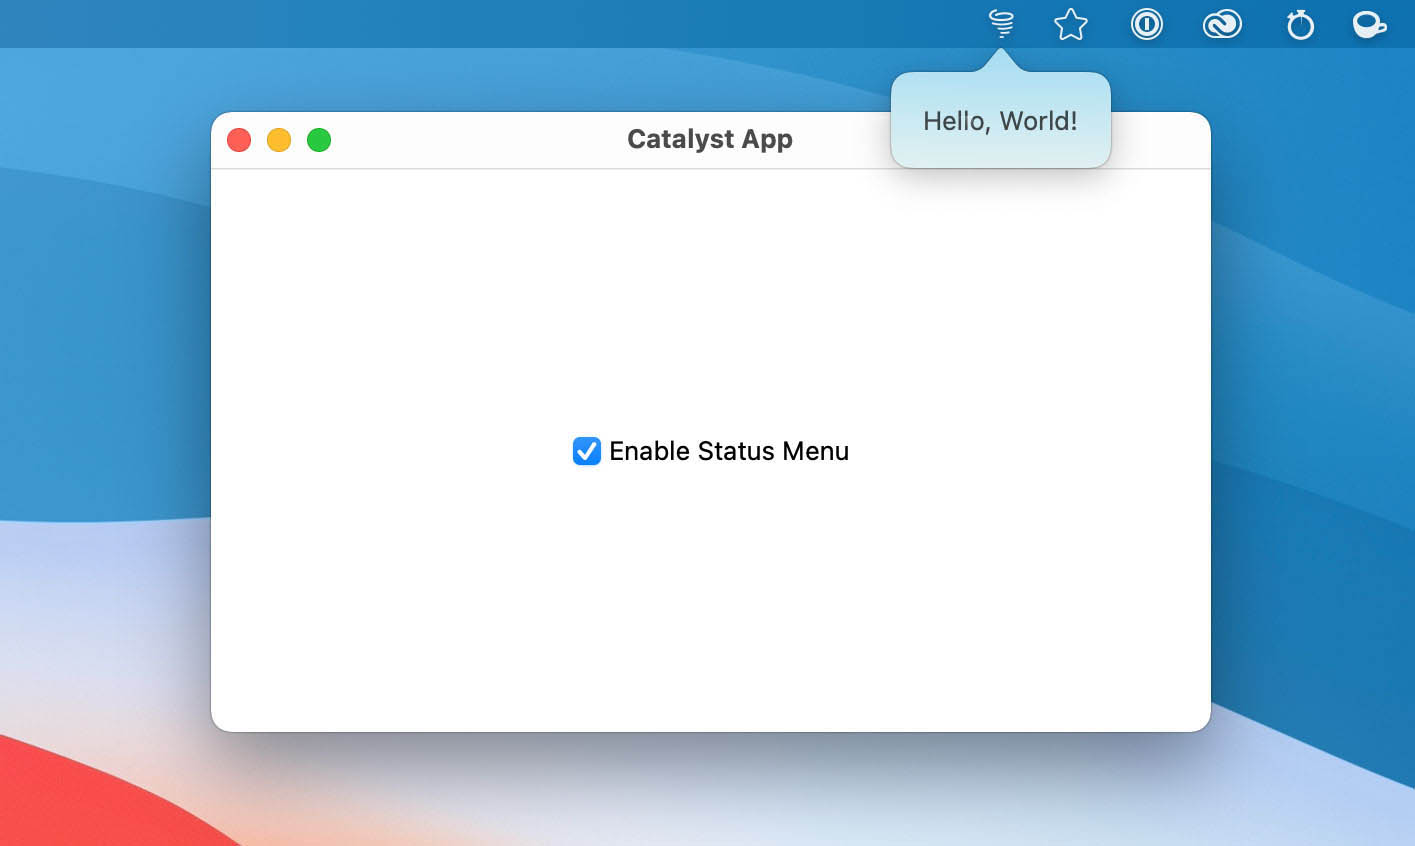
In this post, I will walk you through creating a status menu app — a small Mac app that runs separately from its parent app — and embedding it in a Mac Catalyst app. The parent app will have a checkbox that shows or hides the status menu, and clicking the status menu icon will show a popover.
Create the Status Menu App
Let’s start with the fun part: building the status menu app. We’ll build this new app with AppKit and SwiftUI, not iOS or Catalyst. Don’t fret if you’re new to AppKit — this post has all the AppKit code you’ll need, and then you can build the rest of your interface with SwiftUI.
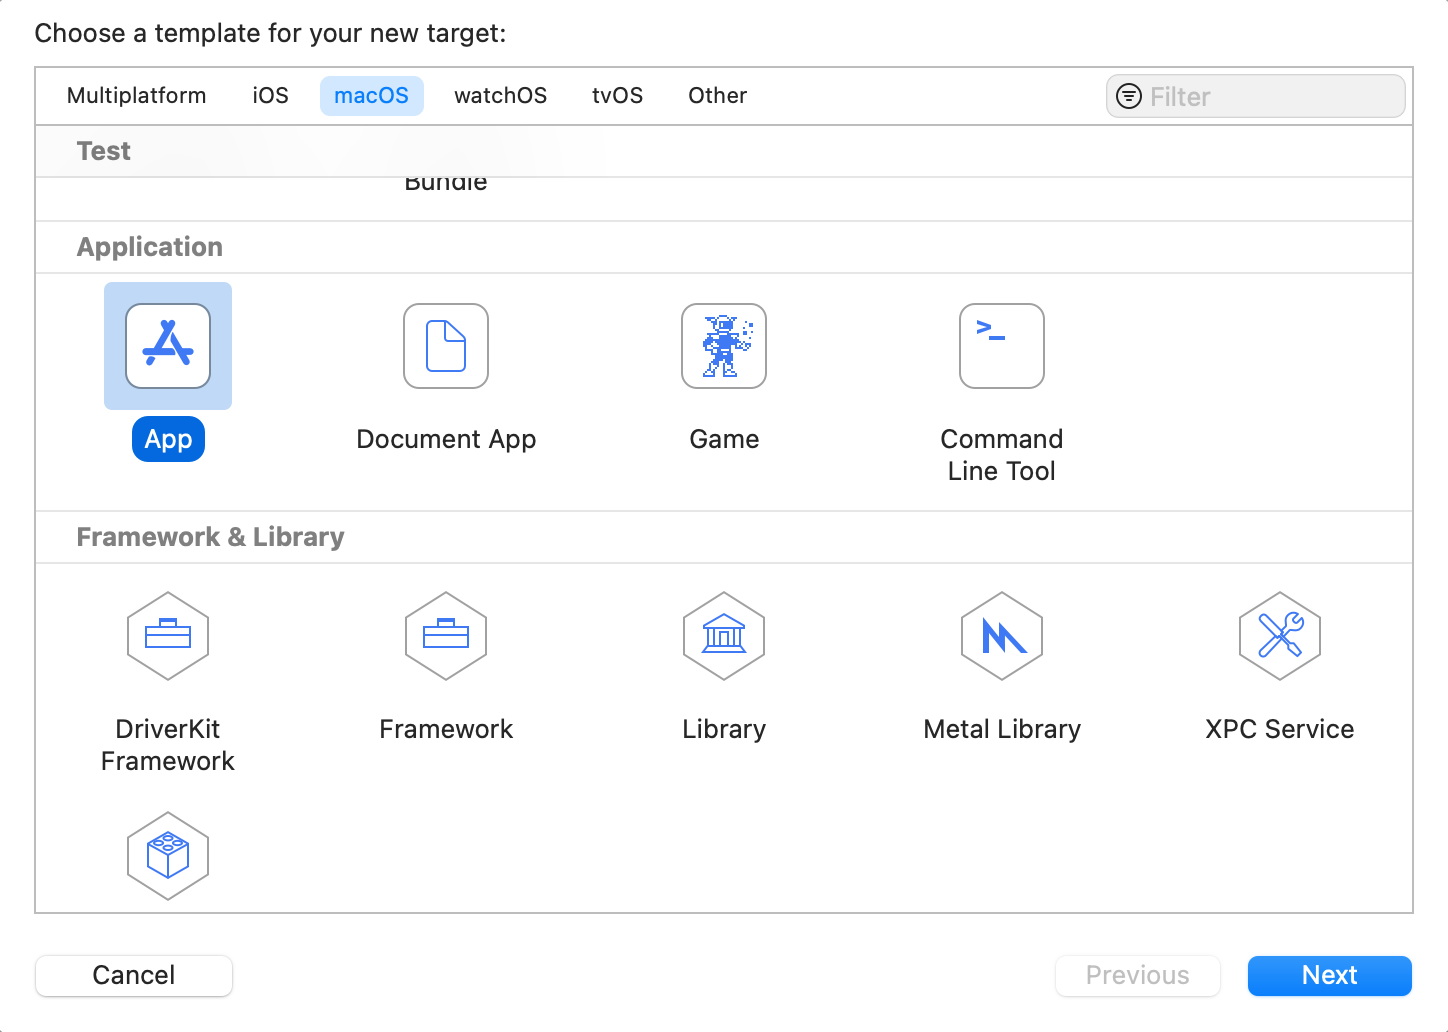
To begin, select your project and add a new macOS App target.
Then in the “Choose options for your new target” screen, select Interface: SwiftUI and Life Cycle: AppKit App Delegate. We need the AppDelegate so we can create a windowless app, which is technically possible with the SwiftUI life cycle but it’s a bit of a hack and still requires an app delegate.
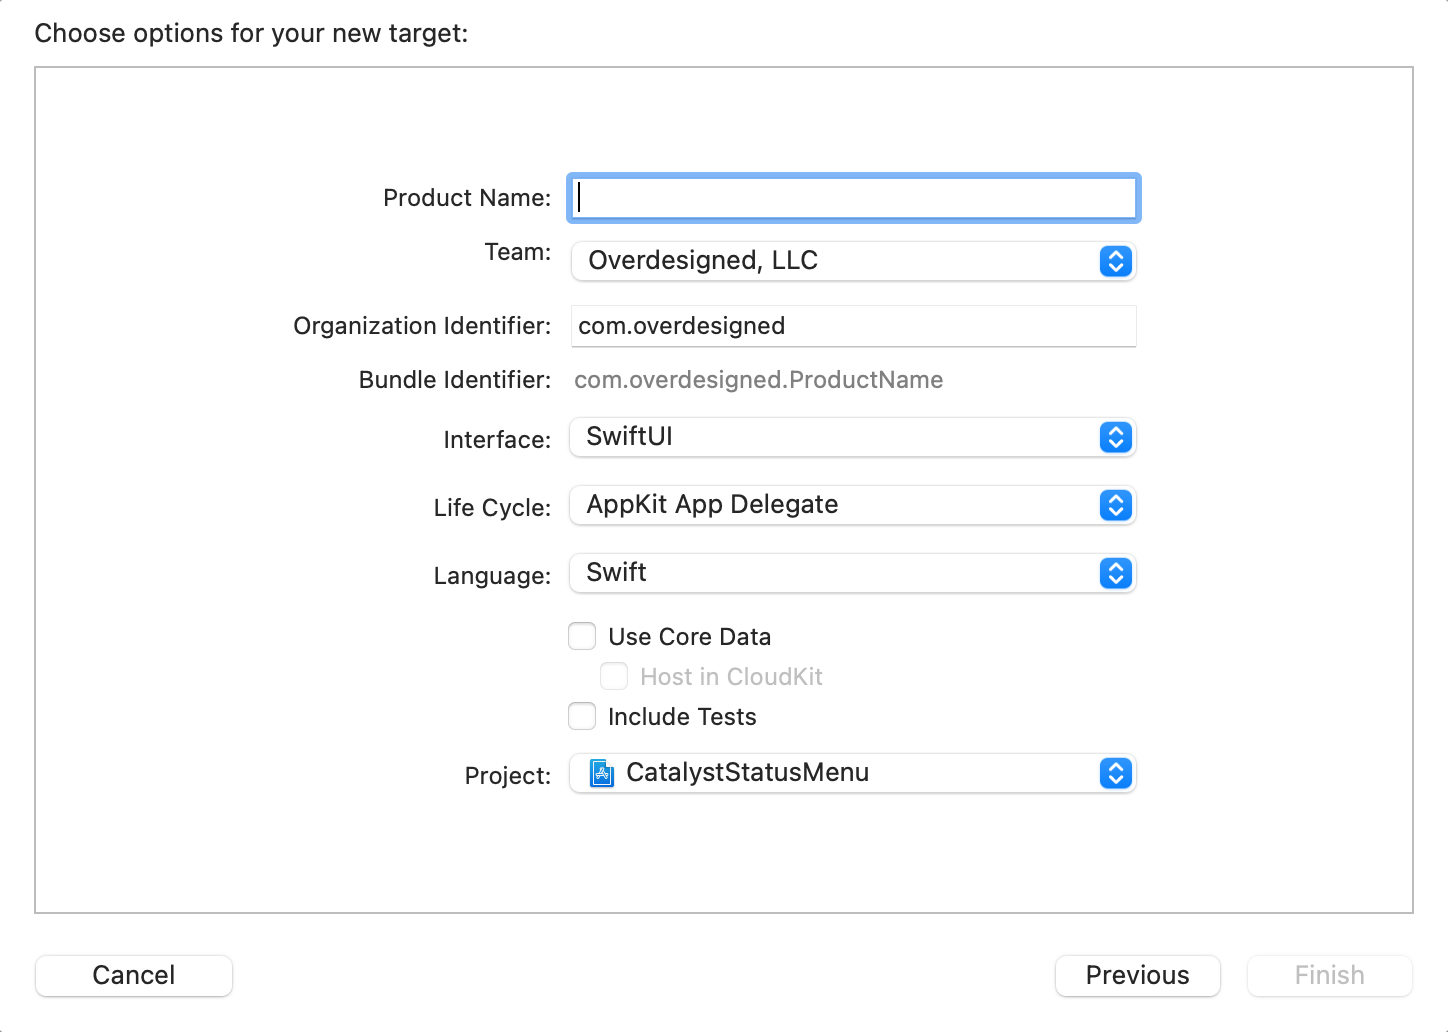
Enter a Product Name and click Finish.
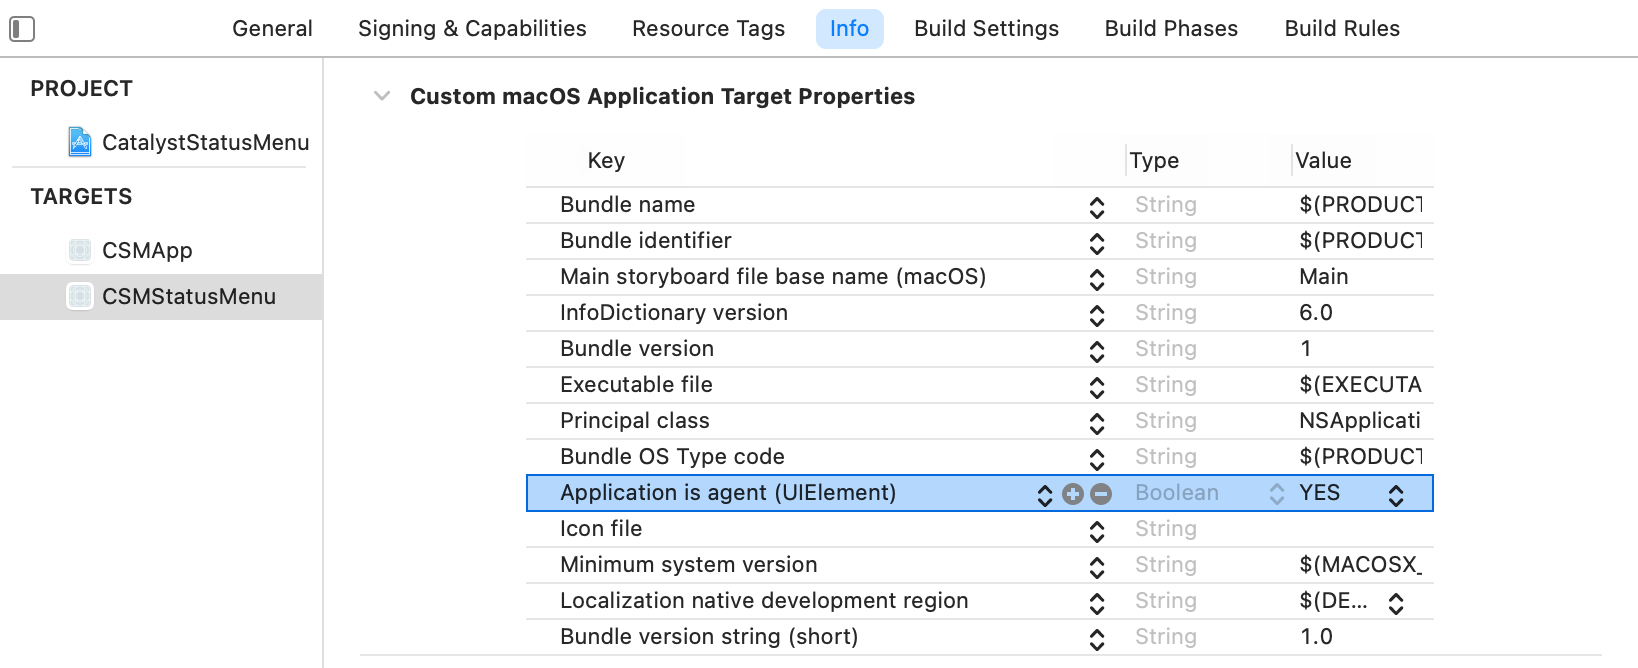
Now select your new target and switch to its Info tab. Add a new property: Application is agent (UIElement). Set its value to YES. This cryptically-named property tells macOS to run your app as an “agent”, which means it won’t appear in the Dock or the Force Quit window.
With that out of the way, we’re ready to code! In the project navigator, open your new target’s AppDelegate.swift and look for applicationDidFinishLaunching. It will contain a bunch of placeholder code creating a window — delete all of that and replace it with this:
// StatusMenuApp/AppDelegate.swift

@NSApplicationMain
class AppDelegate: NSObject, NSApplicationDelegate {

    var statusItem : NSStatusItem!
    var popover : NSPopover!

    func applicationDidFinishLaunching(_ aNotification: Notification) {

        // Create the status item
        statusItem = NSStatusBar.system.statusItem(withLength: NSStatusItem.variableLength)
        if let statusButton = statusItem?.button {
            statusButton.image = NSImage(systemSymbolName: "tornado", accessibilityDescription: nil)
            statusButton.action = #selector(togglePopover(sender:))
            statusButton.target = self
        }

        // Create the popover
        popover = NSPopover()
        let content = NSHostingController(rootView: ContentView())
        popover.contentViewController = content
        popover.contentSize = content.view.intrinsicContentSize
        popover.behavior = .transient
        popover.animates = false
    }
}
This code does two things:
- Creates a new
NSStatusItemin the system status bar. Status items can have either a drop-down menu or a button; we’ll create a button with a tornado icon that displays a popover when clicked. - Creates an
NSPopoverwith a SwiftUI view. We set the popover’sbehaviorto.transient, which means the popover closes if you click anywhere outside of it, andanimatesto false because I find the default open/close animations to be frustratingly slow. We also set the popover’scontentSizehere using the SwiftUI view’sintrinsicContentSize— ideally SwiftUI would size the popover for us, but in my testing it seems we need to set thecontentSizebefore we try to show the popover or its position will be wrong.
Now all we need is to add togglePopover(sender:) to AppDelegate.swift, which either shows the popover relative to the status item, or closes the popover if it’s already showing.
// StatusMenuApp/AppDelegate.swift

@objc func togglePopover(sender: Any?) {
    guard let statusButton = statusItem.button else { return }

    if popover.isShown {
        popover.performClose(sender)
    } else {
        popover.show(relativeTo: statusButton.bounds,
                     of: statusButton,
                     preferredEdge: NSRectEdge.maxY)
    }
}
At this point, you should be able to Run your status menu target. The little tornado icon should appear in the menu bar, and clicking it should show a popover. You’re a Mac developer now!
Embed the Status Menu App in the Catalyst App
Now let’s switch back to our main target, which is our Mac Catalyst app. We need to bundle our status menu app inside our Catalyst app, which first means adding the status menu target as a dependency of our Catalyst app.
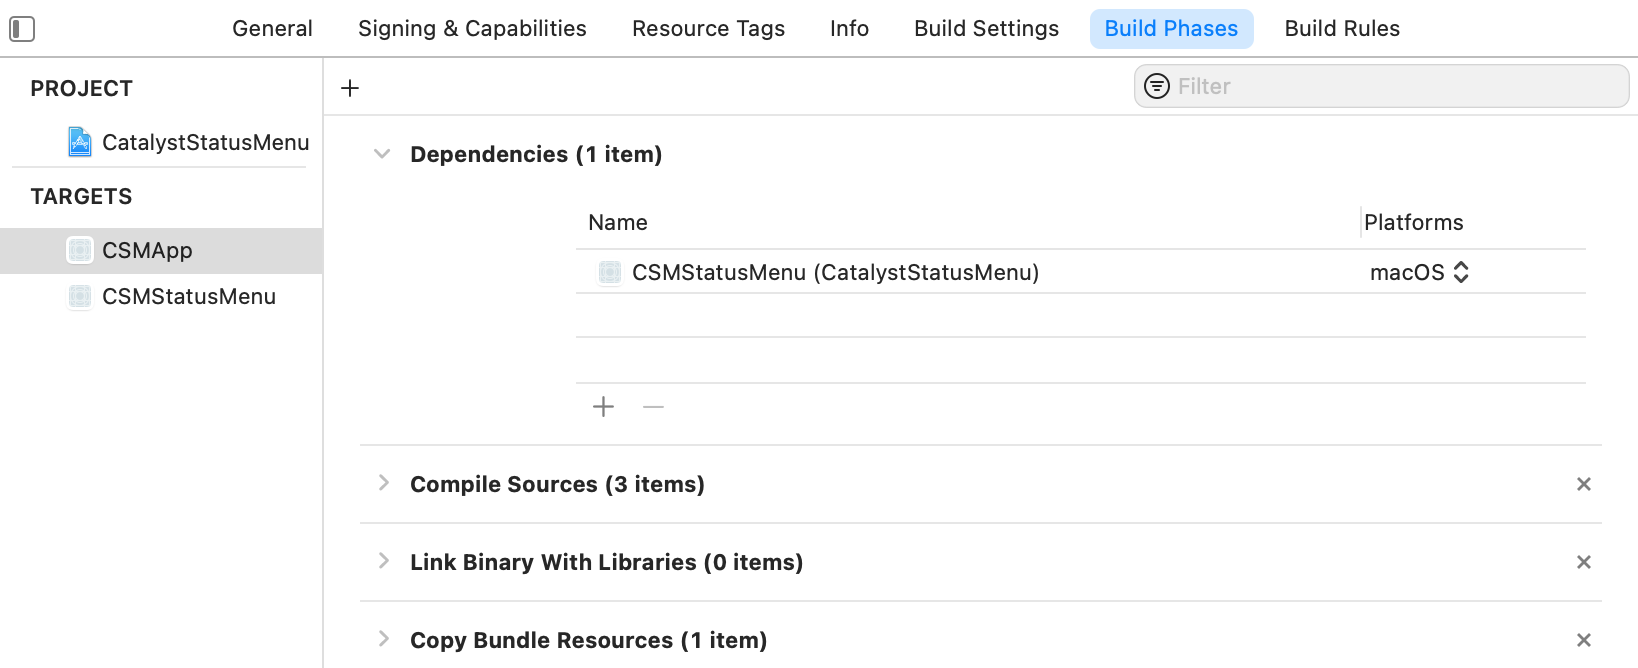
Go to the Catalyst target’s Build Phases tab and open Dependencies. Click the plus button and choose the status menu app’s target. Then click the Platforms drop-down next to the added dependency and select macOS — this tells Xcode to only build the status menu for the Catalyst version of our app.
Now to actually embed the status menu app. Click the plus button at the top of the Build Phases tab and select New Copy Files Phase. Expand the new “Copy Phase”, rename it to “Copy Status Menu”, and set its Destination to Wrapper and Subpath to Contents/Library/LoginItems. Click the plus button to add your status menu app’s product (it should have a name like Your_Status_Menu_Target.app); then in the Platforms drop-down, select macOS.

Now Run your Catalyst app. It should compile and run, but you won’t see the status menu because we haven’t done anything to launch it. The final step is to implement the method for enabling the status menu.
Set the Status Menu App as a Login Item
Status menu apps are usually run as login items, which means they are launched automatically when a Mac is restarted. Because our Catalyst app is sandboxed, the only way to set a login item is to call this method from the ServiceManagement framework:
Boolean SMLoginItemSetEnabled(CFStringRef identifier, Boolean enabled);
That’s a global C function and it’s marked as unavailable in iOS and Catalyst. Thankfully, this is easy to work around: just add the function definition to your Catalyst app’s bridging header (add one if you don’t have one).
// CatalystApp/CatalystApp-Bridging-Header.h

#ifndef CatalystApp-Bridging-Header_h
#define CatalystApp-Bridging-Header_h
#include <CoreFoundation/CoreFoundation.h>

// other Objective-C imports here...

Boolean
SMLoginItemSetEnabled(CFStringRef identifier, Boolean enabled);

#endif
Sticking that in a header file will convince the compiler that calling SMLoginItemSetEnabled(_:_:) is okay. To use it, just import ServiceManagement and pass in your status menu app’s bundle identifier as CFString. The function will return true if the login item is successfully enabled/disabled, or return false if it couldn’t find an embedded app with the given bundle ID.
// CatalystApp/StatusMenuHelper.swift

import SwiftUI
import ServiceManagement

class StatusMenuHelper: ObservableObject {

    private func setStatusMenuEnabled(_ isEnabled: Bool) -> Bool {
        let bundleId = "status_menu_app_bundle_id" as CFString
        return SMLoginItemSetEnabled(bundleId, isEnabled)
    }

    @AppStorage("status-menu-is-enabled")
    var isEnabled = false {
        didSet {
            if setStatusMenuEnabled(isEnabled) {
                // success!
            } else {
                // SMLoginItemSetEnabled failed
                isEnabled = false
            }
        }
    }
}
For convenience, I also created an isEnabled property using AppStorage so the enabled state is saved to UserDefaults. Now all that’s left to do is bind isEnabled to a Toggle in our Catalyst app’s interface:
// CatalystApp/CatalystAppView.swift

struct CatalystAppView: View {

    #if targetEnvironment(macCatalyst)
    @StateObject var statusMenuHelper = StatusMenuHelper()
    #endif

    var body: some View {
        VStack {
            #if targetEnvironment(macCatalyst)
            Toggle("Enable Status Menu", isOn: $statusMenuHelper.isEnabled)
            #endif

            ...
        }
    }
}
And that’s it! Flipping that toggle on should show the status menu, and if you restart your computer the status menu should automatically relaunch. The full sample project for this post is available on GitHub, and check out Cheatsheet to see a status menu working in a production app. Thanks for reading!
Posted by Adam Overholtzer on August 26, 2021